

What is image cropping?
First, cropping has nothing to do with farming, so I will not be asking you to plow or sow or anything like that. To “crop” an image is to remove or adjust the outside edges of an image (typically a photo) to improve framing or composition, draw a viewer’s eye to the image subject, or change the size or aspect ratio.
In other words, image cropping is the act of improving a photo or image by removing the unnecessary parts.
Chances are, you’ve already done some image cropping without even realizing it. If you’ve ever taken a photo with your phone’s camera and then posted that photo as an Instagram image, you’ve had to choose how much of the overall photo to include in Instagram’s square image format. That’s image cropping!
The Rule of Thirds
It may seem illogical, but typically the most interesting or eye-catching photos don’t have the main subject smack dab in the center of the image. In fact, it’s kind of a rule of photography that your main subject shouldn’t be in the center.
But if it’s not in the center, where does it go? That’s where the rule of thirds comes in.
The rule of thirds divides all images into three equal horizontal and three equal vertical sections (or nine individual boxes) separated by grid lines. The basic concept is that you want to place the points of interest near the spots where grid lines intersect.
Did you ever wonder why the camera view on your phone has a grid?
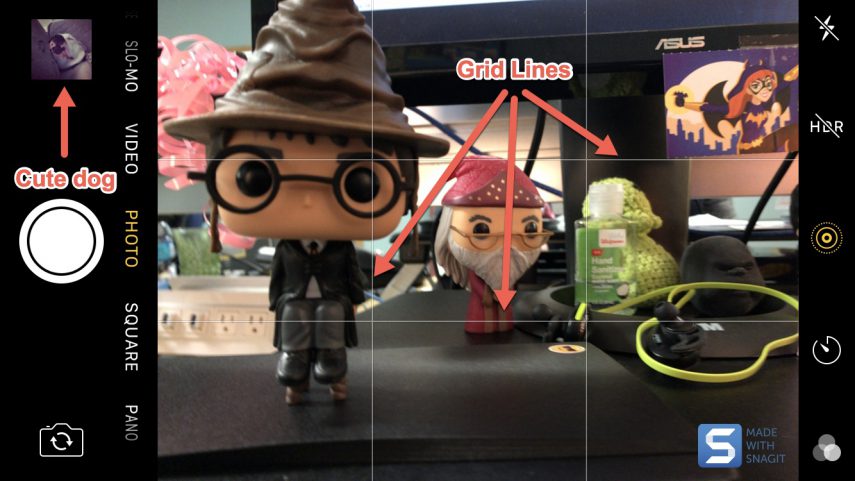
It’s because of the rule of thirds. The above screenshot of my iPhone camera app taking a photo of the Harry Potter nerd toys on my desk shows the grid lines. They’re there to help you compose your image. The idea is that when you’re lining up your shot, you would use the grid lines to ensure that your image uses the rule of thirds.
You can also see my dog Reo. Isn’t she cute?
But composing your image when you take a photo is only the start. Many times you’ll want to adjust the photo even further. The first step is cropping. There are many reasons why you might want to crop a photo, including (but not limited to) the discovery of background elements you didn’t realize were there, issues with the framing or composition, to better focus on the main subject, etc.
To crop your image, you’ll need a photo editor. I’m using Snag it, but most photo editors (even the ones on mobile devices) offer basic cropping functions.
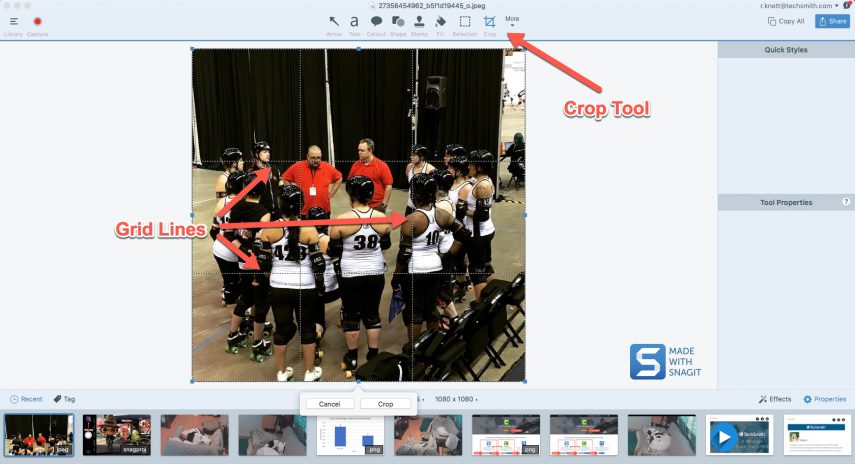
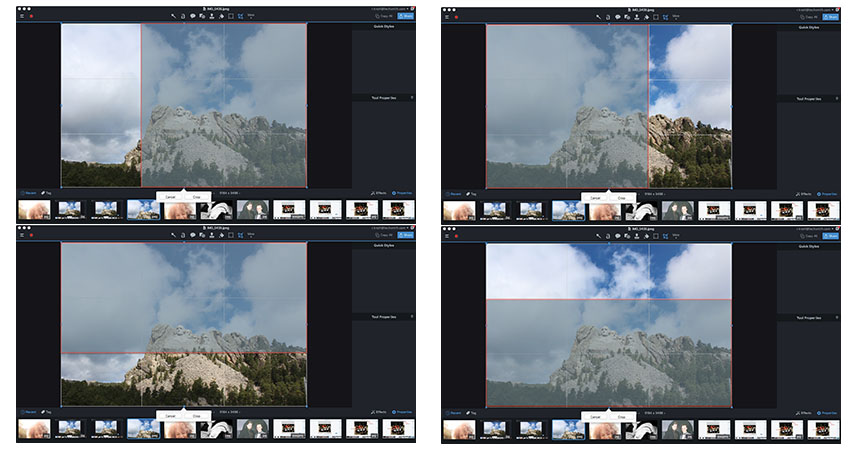
Just like on your phone’s camera, photo editor cropping tools have grid lines to help you crop according to the rule of thirds. I grabbed a Snagit screen shot of my Snagit cropping tool (how meta is that?). This photo of my friends on the Detroit Roller Derby team is in definite need of a crop and you can see the grid lines ready to help me improve the image.
In the next screenshot, you can see my adjustments:
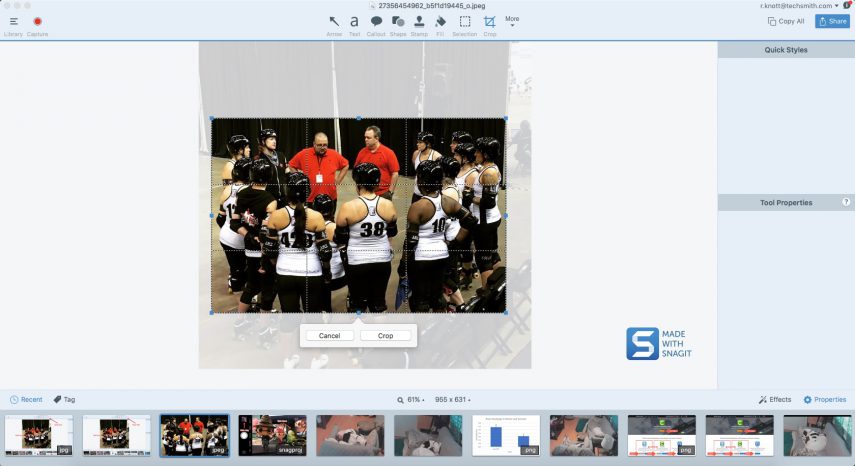
You can see that the grid lines moved as I cropped the image to show how the adjusted image fits with the rule of thirds.
Which image do you think is better?
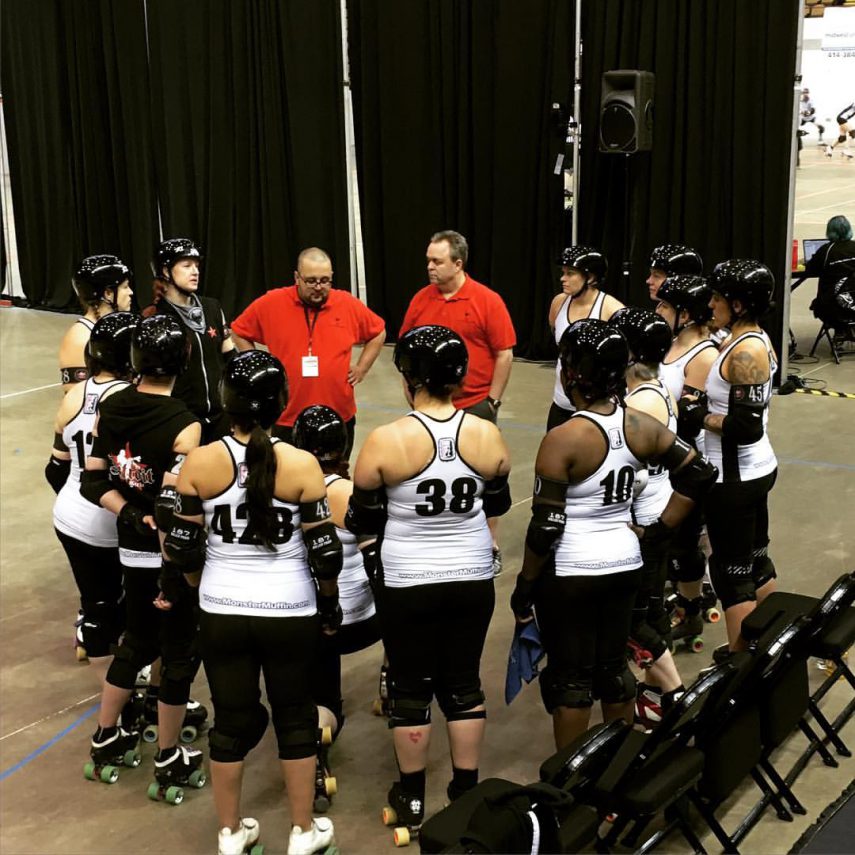
The original image?
Or the cropped image?
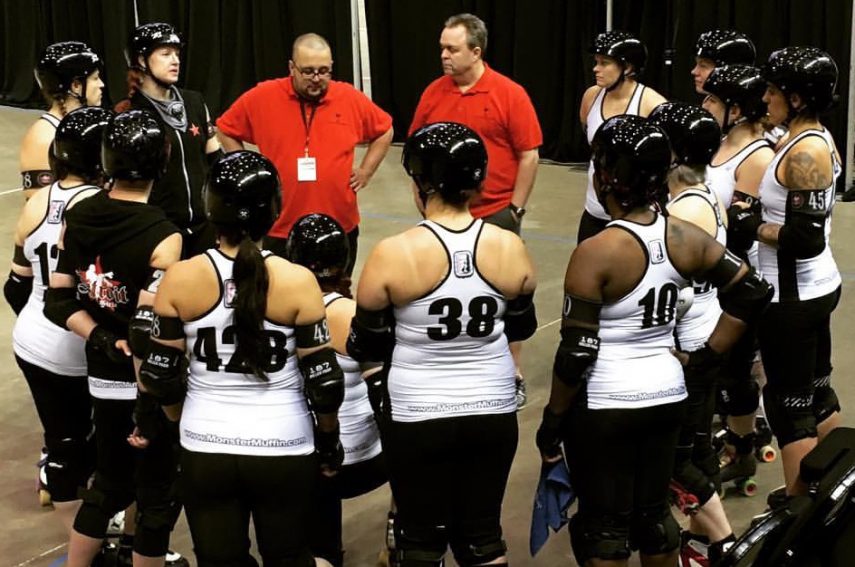
The cropped image brings us closer to the subjects and cuts out the unnecessary elements from around the outside of where the skaters and coaches are standing. The faces we can see are all in the outer or upper thirds of the image. It may not be perfect, but it’s definitely better.
It’s important to point out that the rule of thirds does not dictate that your subject can only be in one-third of the photo area. You can easily divide the image into two-thirds areas, as well, like so:
Other Cropping Tips
But the rule of thirds is just the beginning.
Take this amazing photo of my friend and me at my senior prom many years ago (and please forgive the quality).
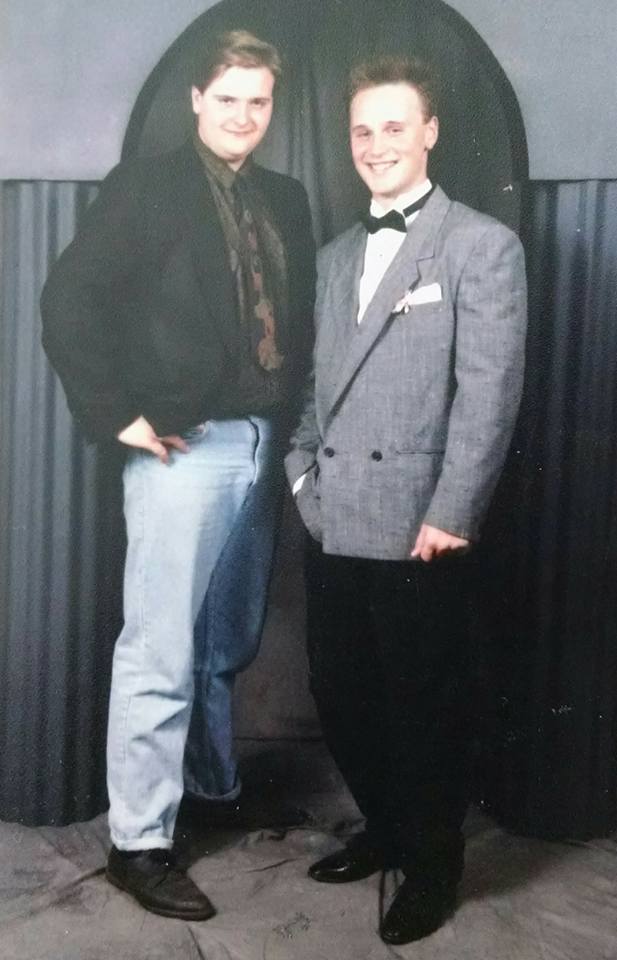
First off, yes I wore jeans to my senior prom. I was trying to be a rebel. (Also, yes, my principal yelled at me.)
But more importantly, the photographer chose to show our entire bodies because MOST people were dressed in beautiful dresses or tuxedos so it’s natural that they would want to photo to show the whole outfit, including the shoes.
However, our clothes aren’t really that important, so you can play around with cropping a bit to emphasize different aspects of a photo.

This cropped version brings more attention to our faces (and amazing early-90s hair) and distracts a bit from the fact that I apparently wore my teen angst on my sleeve (or, on the lower half of my body, as the case may be).
Generally speaking, when using photos of people or animals, the closer the crop, the more “dramatic” the photo.

For example, in this photo of a smiling woman, you get a complete view of what she’s doing and where she is. We have a lot of context of her surroundings, which helps tell the story of the photo.

But in this cropped version, we’re drawn more to her face and the fact she’s focused on her phone. The setting isn’t as important as the subject herself. We’ve narrowed the story a bit to capture only what she’s doing.
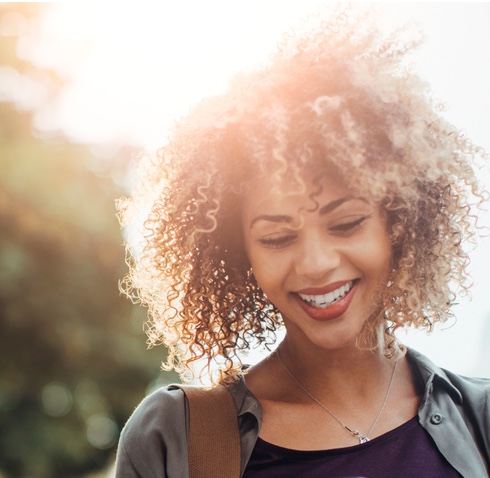
Cropping it further takes the phone out of the image entirely and now we’re left with just her face to contemplate. What is she thinking about? What’s making her smile? Did we catch her in mid-laugh? By taking out parts of the overall story, we’re left to create it for ourselves.
That was also a great example of another reason for cropping: changing the image’s shape and/or aspect ratio. The original image was horizontal. The first crop turned it into a vertical image and the final crop made it a square. Depending on the image’s use, shape can be very important.
Potential Pitfalls
So, we’ve learned some basics on cropping images, but what’s the downside?
Probably the first thing is that when you crop an image and save it, you’ve destroyed the original image. For that reason, I strongly suggest you save a copy of your image and then make any edits on the copy rather than the original. As someone who has lost great images to bad editing, I can’t stress that point strongly enough.
Second, remember that the closer you crop, the smaller the actual image becomes. If the original image is 1280×1024 pixels and you crop it down to 640×512, you have reduced the size by half. So, always make sure any cropping you do will leave an image large enough to fill the space you need to fill. Remember, with photos, you cannot simply adjust it back up to the size you need. You’ll lose resolution and end up with a pixelated, blurry photo.
Third, it’s really easy to OVER-crop a photo. Especially when cropping close to a person’s face. Give the subject some room to breathe. In the final photo of the smiling woman above, that crop is probably a little too close, but I wanted to show what would happen when we removed the phone. If I was using that photo for publishing in another capacity, I probably wouldn’t have cropped quite that tightly.
Finally, don’t get too caught up in rules. Play around with it and see what pleases your eye. Rules are rules, but rules can be broken, sometimes to great effect.
There are a ton of other resources out there for learning about image cropping and we’ve covered just a few basics here to help you get started. Have suggestions or comments? I’d love to hear them!